
I was getting tired of having to clean my glass jugs through the narrow mouth with a bottle brush, a lot of work for poor results.
On top of that, I’m more and more happy with plastic buckets for my larger, 5 gallon, batches.
I started looking for smaller food grade plastic buckets I could use as fermenters for my small batches, and my local DIY store had plenty at the paint (and beekeeping) department.
As we need about 20% headspace for the krausen (foam) that forms above the beer during fermentation, I got myself a 1.25Gal bucket for about 5 bucks with a lid (if you brew 5L, get yourself a 8-10L bucket)
This thing is the answer !

- It’s a million times easier to clean than a glass jug
- It won’t break
- It’s easy to fill (no funnel required) and you can splash the wort as much as you want, which is great for oxygenation
- It’s more convenient for dry hopping (= adding hops during fermentation)
- It protects your beer from daylight during fermentation
- You can stack several of them when not in use
It just takes a little DIY for the bubbler.
All you have to do is drill a 12mm hole in the lid and get yourself one of these rubber grommets
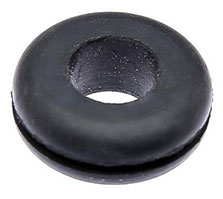
Just make sure the bucket is made of food grade plastic (often marked with a fork and knife logo at the bottom) and you are good to go.
Like with any plastic component, use non-scratch scrub pads for cleaning to avoid creating scratches where bacteria can hide.
If you are the kind who uses a screen in your funnel when transferring to the fermenter, just use a strainer bag instead, which will also allow you to switch to small batch BIAB (Brew-in-a-Bag) brewing, which has become my favorite brewing method now.
I used my one gallon primary fermenter today for the first time. Was trying my best to keep the sanitary thing going but every time I put my airlock into the plastic top, with grommet, the grommet kept pushing out and into my wort. Took three times to get it to stay in position. Any suggestions on how to do this in the future? I’m concerned I did not get the wort sealed enough before the fermentation process.
Feel free to install the bubbler in the grommet before sealing the lid on the bucket. Just take the lid in your (sanitized) hands and hold the grommet from behind while you push the bubbler in.
I use a 2 gallon plastic bucket to brew 1.32 gallon batches (net result is about a gallon). I added a spigot to the bucket so that I can either transfer to a keg or bottle. I use carb drops if I bottle. I also added another hole so that I can insert a thermometer to watch fermentation temperatures. This also allows me to add my airlock with ease. I also spray the airlock and grommet with sanitizer to also help make it easier to insert airlock.
I am curious to know what is everyone’s brew house efficiency?